Dealing with pesky bugs at home? Crafting your own sticky traps is a cost-effective and efficient solution. Say goodbye to unwanted insect intruders with these DIY sticky traps that are easy to make and highly effective.
Making efficient sticky traps for insects is a simple procedure. Begin by gathering materials—cardstock, twine, and non-toxic sticky adhesive. Trim the cardstock, make hangers, and spread the glue evenly. Hang in a smart way to draw bugs in with the vivid color. Keep an eye on things and change the traps when the adhesive starts to lose its stick.
Monitor regularly, replacing traps when adhesive loses effectiveness. Keep living spaces bug-free with this simple DIY solution.
6 Steps by steps guide to Make Effective Sticky Traps for Bugs:
Regularly check and replace when the glue becomes weaker. This do-it-yourself, inexpensive technique guarantees bug-free living areas.
Step 1: Gather Your Materials
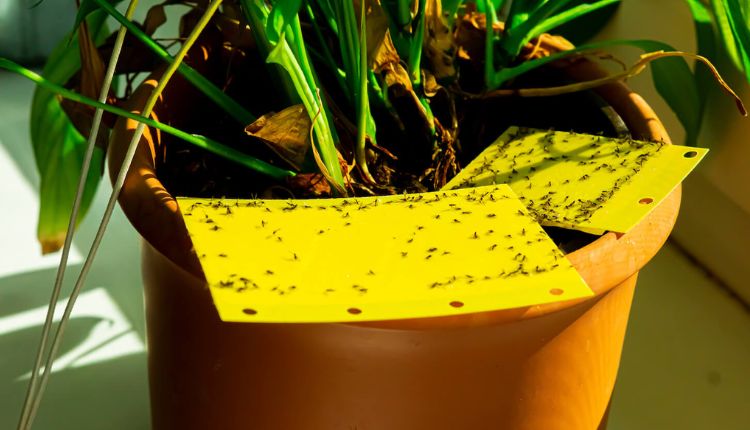
Collect Your Materials is the first, easy, but essential step in making successful sticky traps for bugs. Begin by assembling the required materials: yellow cardstock or cardboard, scissors, string, and a non-toxic sticky adhesive. Selecting the right materials is essential; yellow cardboard gives bugs a visually appealing basis, and string allows for strategic hanging.
The sticky adhesive that is non-toxic and essential for safety is what catches and renders bugs motionless when they come into touch.
A seamless crafting process is ensured by having an adequate supply of materials. Bright yellow cardboard works well for drawing in flying insects. Cutting the cardstock into rectangles of the right size with scissors is necessary to make sure the traps are both practical and controllable. Each cardboard piece has a thread attached to the top that makes it possible to hang the traps, which may be placed strategically in bug-prone regions.
Step 2: Cutting the Base Material
When making sticky traps for bugs, cutting the base material is an essential step in making sure the traps work as best they can. The following are important things to remember:
- Cardstock or Cardboard: Utilize yellow cardstock or cardboard for its bright color, attracting flying insects effectively.
- Size Precision: Cut the material into small rectangular pieces, striking a balance between being large enough to attract bugs and manageable in size.
- Tool of Precision: Use scissors for accurate and clean cuts, ensuring the traps are of uniform size and fit for purpose.
Step 3: Creating the Hanger
Making the hanger gives the insect traps more functionality and is an essential stage in the construction process. In order to do this, cut a length of string and fasten it to the top of each piece of cardboard. By acting as a hanger, the string allows the traps to be strategically suspended in bug-prone regions.
By taking this step, the traps become more versatile and can be conveniently positioned close to windowsills, corners, and other potential entry locations where bugs are frequently seen.
The addition of a hanger enhances the effectiveness of the traps by enabling them to be positioned strategically for the best chance of catching bugs.
Step 4: Applying the Sticky Adhesive
If you want to create successful bug traps, using the sticky adhesive is essential. It entails evenly applying a thick layer of non-toxic adhesive to one side of each piece of cardboard.
This guarantees a sticky surface that, upon touch, traps insects. The efficiency of the traps depends on the consistent application of adhesive, which makes them a powerful solution for dealing with bug-related issues in and around your living spaces.
Step 5: Placing the Traps Strategically
Placing the traps strategically is essential for optimizing their bug-catching effectiveness. Consider the following key points:
- Choose Bug-Prone Areas: Hang traps in areas commonly frequented by bugs, such as corners, windowsills, or near potential entry points.
- Utilize Bright Color: The bright yellow color attracts flying insects, increasing the traps’ visibility and efficacy.
- Ensure Adequate Spacing: Avoid overcrowding; space traps appropriately to maximize coverage without hindering their individual effectiveness.
Step 6: Monitoring and Replacing
Maintaining the efficacy of pest control requires regular trap replacement and monitoring. Check traps frequently for bugs that have been caught, making sure the sticky glue hasn’t become saturated or lost its potency. Replace a trap as soon as it is full or loses its stickiness. By keeping an eye on things constantly, the traps can catch bugs without losing effectiveness.
The DIY sticky traps continue to be a dependable and effective option, steadily enhancing bug-free living environments by using this routine of monitoring and replacement.
Related Questions:
How Do You Make A Sticky Trap For Insects?
To create a sticky trap for insects, gather yellow cardstock or cardboard, scissors, string, and non-toxic sticky adhesive. Cut the material into rectangles, attach a string to each for hanging, and evenly apply the adhesive to one side. Hang the traps strategically in bug-prone areas using the string.
Regularly check for captured insects, and replace traps when the adhesive loses effectiveness. This simple DIY method offers an affordable and effective way to manage insect issues around your home using readily available materials
What Kind Of Glue Is Used For Sticky Traps?
For sticky traps, a non-toxic and sticky adhesive, often resembling a glue, is commonly used. This adhesive is specifically designed to capture insects effectively. It’s important to choose a glue that is safe for indoor use and doesn’t contain harmful chemicals. Look for products labeled as insect traps or sticky traps adhesive, ensuring they meet safety standards for use in homes.
Such adhesives are formulated to be sticky enough to catch insects but are not harmful to humans or pets when used as directed.
How Do You Get Rid Of Bugs In A Sticky Trap?
To remove bugs from a sticky trap, approach it carefully to prevent escape or damage. If the trap is disposable, fold or roll it to encapsulate the insects and place it in a sealed plastic bag before discarding. For reusable traps, clean the sticky surface according to the manufacturer’s instructions for future use.
After handling the trap, wash your hands thoroughly to maintain hygiene. Regular monitoring and proper handling ensure the traps consistently contribute to a bug-free environment.
How Do You Make Homemade Glue Traps?
To create homemade glue traps, gather materials like cardstock or cardboard, scissors, string, and a homemade adhesive mixture. Cut the cardstock into small rectangles, attaching string to the top for hanging. Formulate a homemade adhesive by combining a sticky substance like syrup or honey with a thickening agent like cornstarch.
Spread this mixture evenly on one side of each rectangle. Strategically hang the traps in bug-prone areas, ensuring effective placement.
How Fast Do Sticky Traps Work?
The speed at which sticky traps work can vary based on factors like the type of adhesive used, the attractiveness of the trap, and the insect species. Generally, sticky traps can start capturing insects within hours to days. For flying insects, the bright color of the trap can attract them quickly.
However, the effectiveness depends on the particular circumstances, such as the severity of the insect infestation and the trap’s strategic placement in bug-prone areas.
Conclusion:
Creating your own sticky traps for bugs is a simple and effective way to tackle unwanted insects. These DIY traps offer a budget-friendly alternative to store-bought solutions and can be customized to suit your specific needs. Take charge of your bug control efforts with this straightforward and efficient method, keeping your living spaces bug-free and comfortable.


